Using Tables in Five Star Restaurant Reservations
Over the next 8 weeks, we’re going to be covering the key features that make our plugins so useful to our users.
In this post, we’ll go over the table selection feature in the Five Star Restaurant Reservations WordPress plugin. This powerful option, available in the Ultimate version of the plugin, lets you set up different sections in your restaurant (e.g. inside and outside) and then add individual tables to each section. You can then make it so your customers choose their table when booking and/or so the admin can assign/change the table for a reservation.
The tables feature lets you create the table format of your restaurant within the plugin. This means that you can never be overbooked for any given time, as your guests will need to select a table when making their reservations. If none are available, then it’s not possible for a reservation to be made.
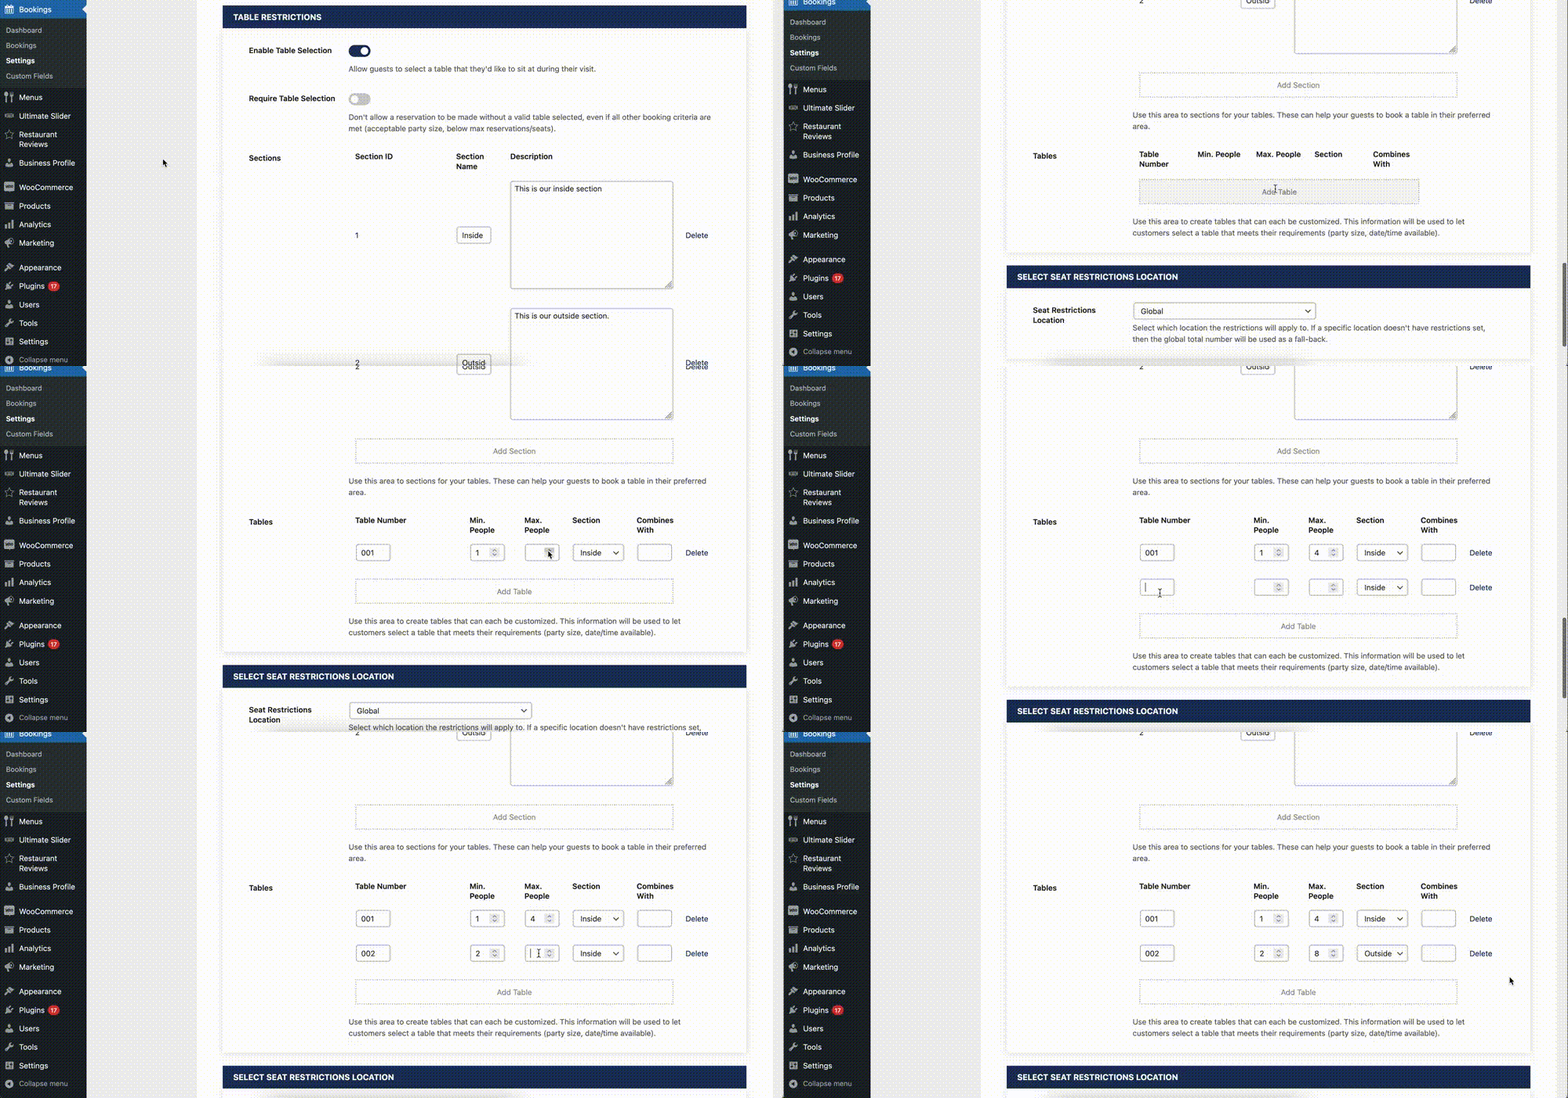
To get started, just open the plugin control panel and navigate to the “Advanced” area of the “Settings” page, and then scroll down to the “Table Restrictions” section. The first thing you’ll want to do is toggle on the “Enable Table Selection” option. Under this, you’ll also see a setting to require table selection, if you’d like to do that.
Now you’re ready to create your first section. After clicking the “Add Section” button, you’ll see two input fields. The first lets you give a short name for the section. This is what your customers will see in your booking form. The second field lets you insert a description, to help you and your staff identify the section.
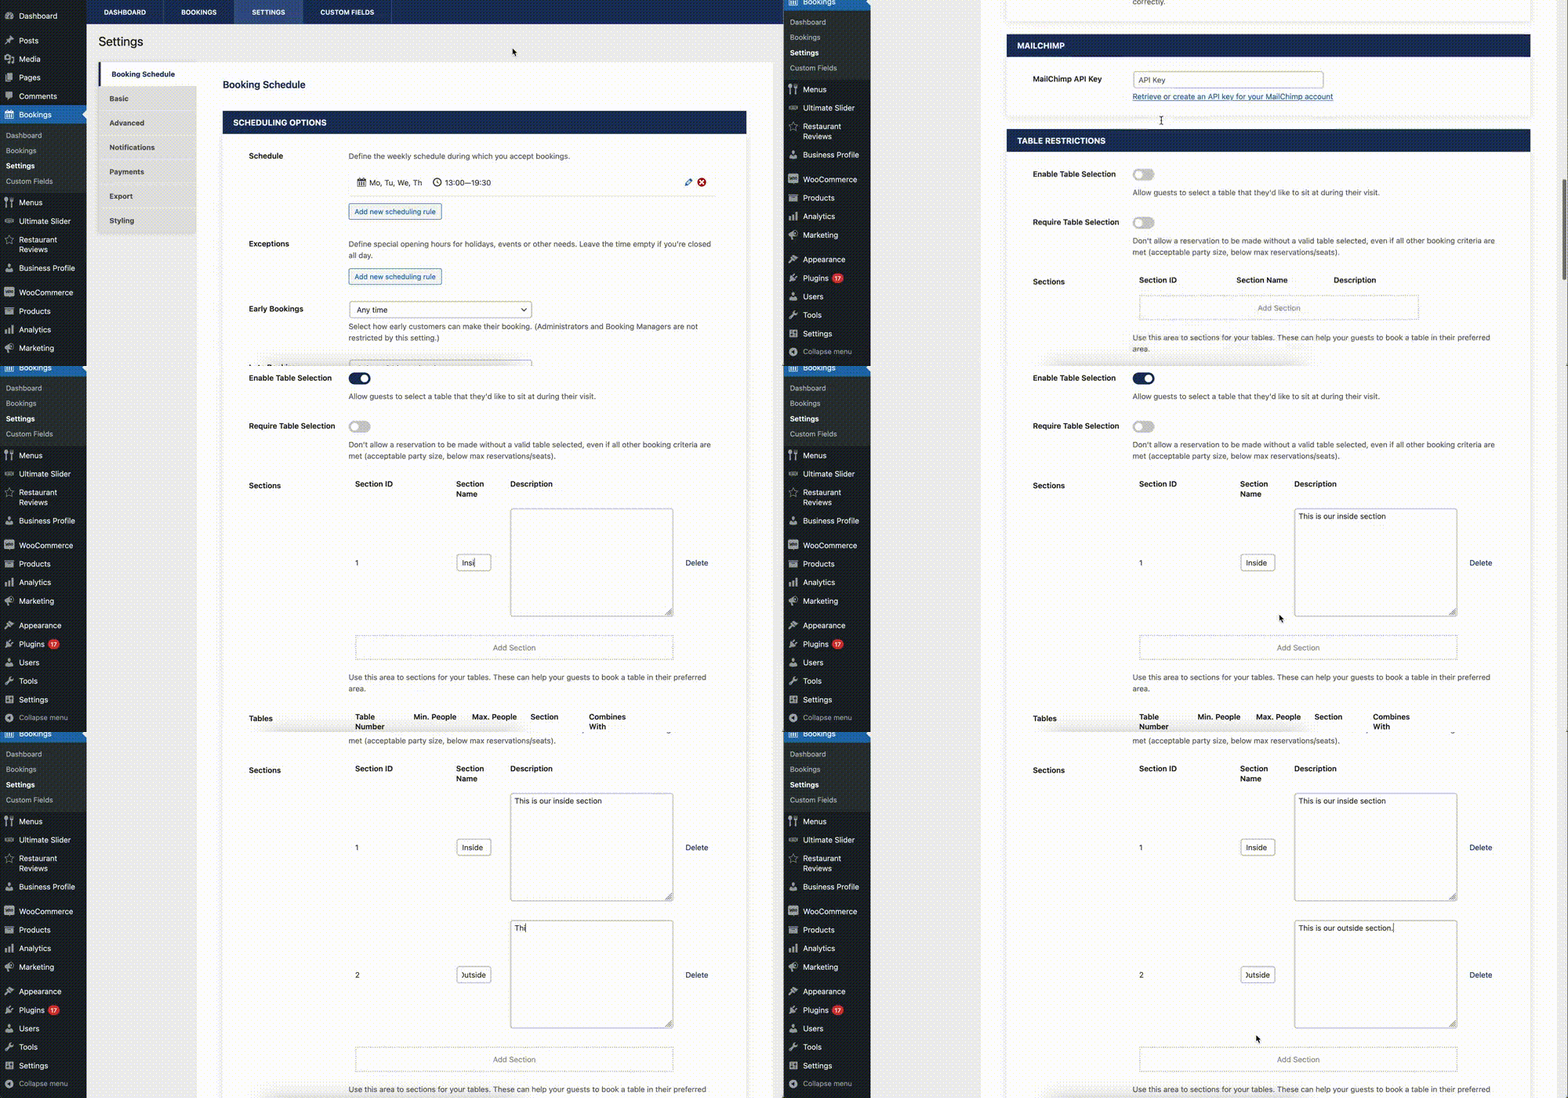
Next, you can move on to creating the individual tables. After clicking the “Add Table” button, you’ll see five input fields. You can start by giving it a unique table number. Then you can specify a minimum and maximum capacity for each table, to make sure smaller tables don’t get overbooked and bigger tables aren’t underutilized. You can then choose what section you want to put your table in, and also if you want to combine it with a different table.
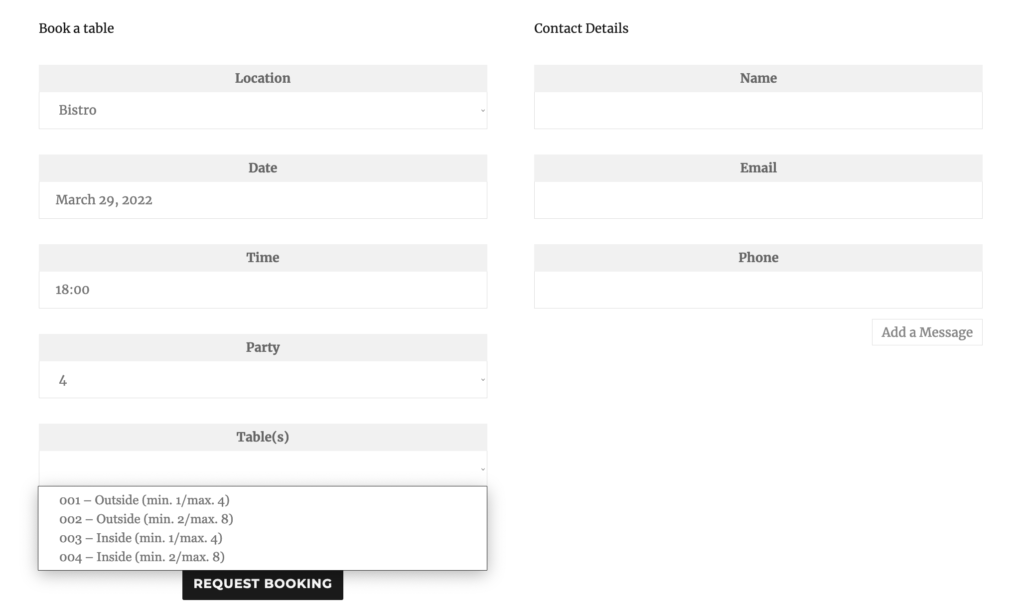
Now, if you go to the reservation page on your site, you’ll see a new “Table(s)” field in your booking form. Your customers now have the ability to pick a specific table when making their reservation. The available tables are automatically updated and removed from the list as bookings for a specific time get filled up.
You can also manage which tables are assigned to specific bookings by going to the “Bookings” page in the plugin admin and clicking the “Edit” button for a reservation. Here you’ll find a “Table(s)” dropdown box that shows you the current table for the booking and that lets you change it to any other available table.
And, if you want to be able to see, at a glance, which table is assigned to each booking, you can click the “Columns” button and enable the “Table” option. This will add a new column to the list of reservations that lets you see all the table assignments without having to open individual bookings.
Check back next Tuesday, when we cover using the table and seat restrictions to control the number of bookings at any given time for your restaurant.

