Restaurant Reservations – Creating a Schedule and Exceptions
Five-Star Restaurant Reservations lets you create a schedule with as many opening and closing periods as you’d like. Want to accept reservations at three different periods during the day on weekends? You can do that. Have a schedule that changes depending on the day of the week? You can schedule for that. Need to block out a week where you’re not accepting reservations? Not a problem. Have multiple locations with different schedules? You can set those up. Unlimited schedule blocks and exceptions are available for multiple locations in both the free and premium version of the plugin.
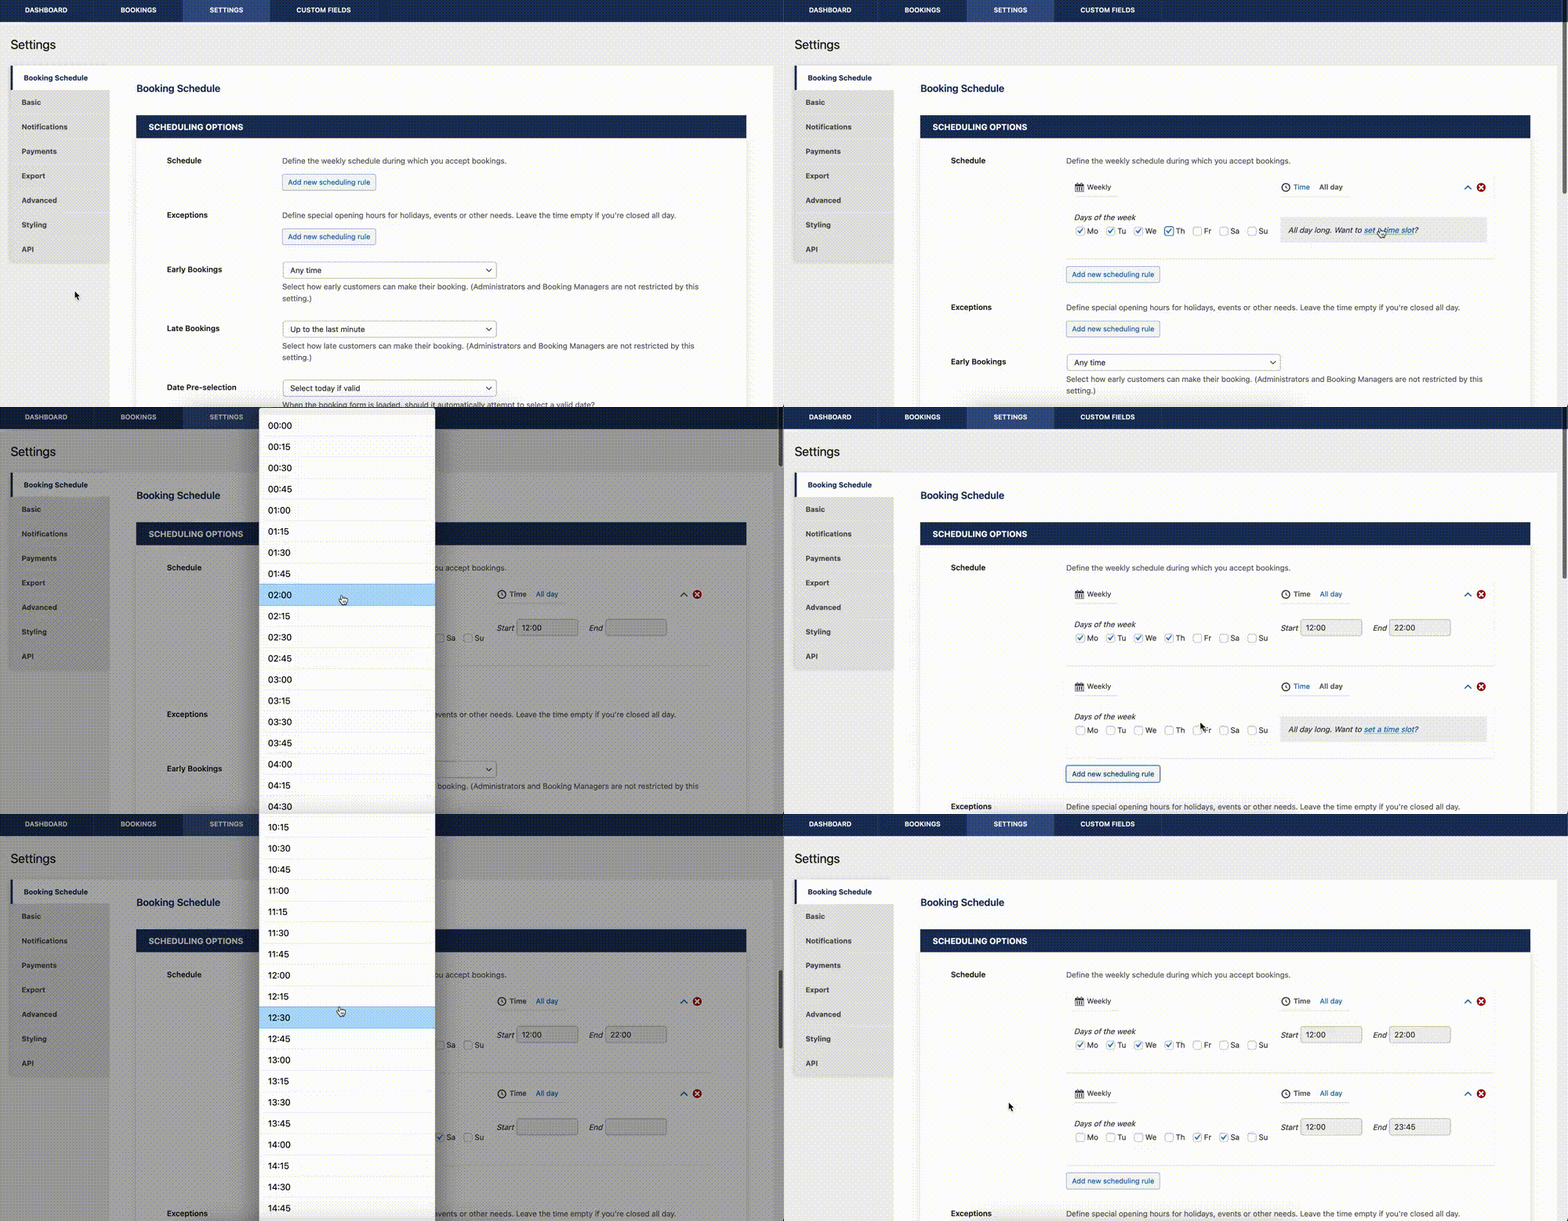
To get started, head to the “Booking Schedule” tab of the plugin settings page. Under “Schedule”, click on the “Add new scheduling rule” button. Next, select the days of the week where this schedule should apply on the left, before clicking on “Time” on the right-hand side and setting the opening hours for that day or those days. If you’re open 24 hours a day on certain days, then don’t worry about setting the time.
You can create as many scheduling rules as needed for your restaurant. If you’re accepting reservations at two different times on a particular day, then create those as separate rules. If you’ve got different hours for different days of the week, then create those as separate rules.

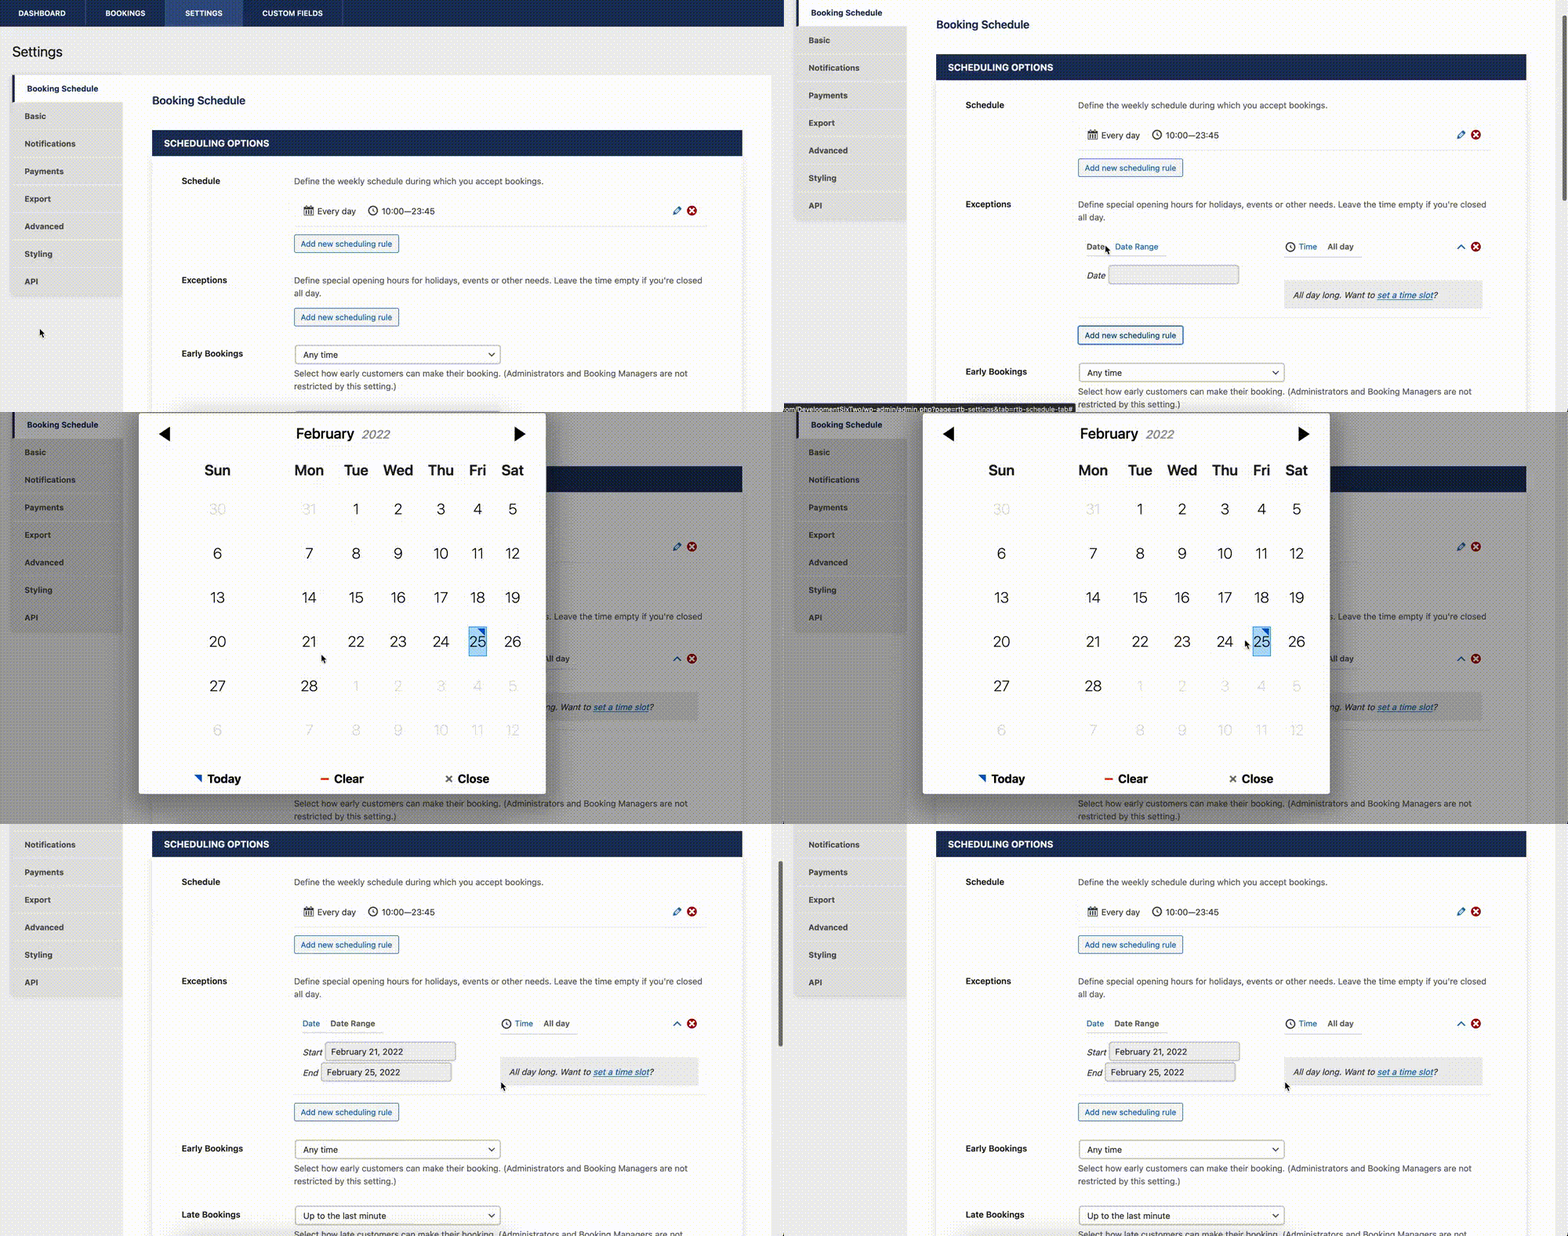
You’ll want to use the “Exceptions” scheduling rules when you’ve got different hours for a specific day or range of dates. For example, if you’ve got extended hours for a holiday like New Years Eve, click on “Add new scheduling rule” and then select December 31st as the date. On the right-hand side, click on “Time” and then put in your extended hours . If your restaurant is closed for a month during the down season, click on “Add new scheduling rule”, select “Date Range” on the left-hand side, put in your start and end dates (and times if you’re running a more limited schedule instead of being closed on those dates).

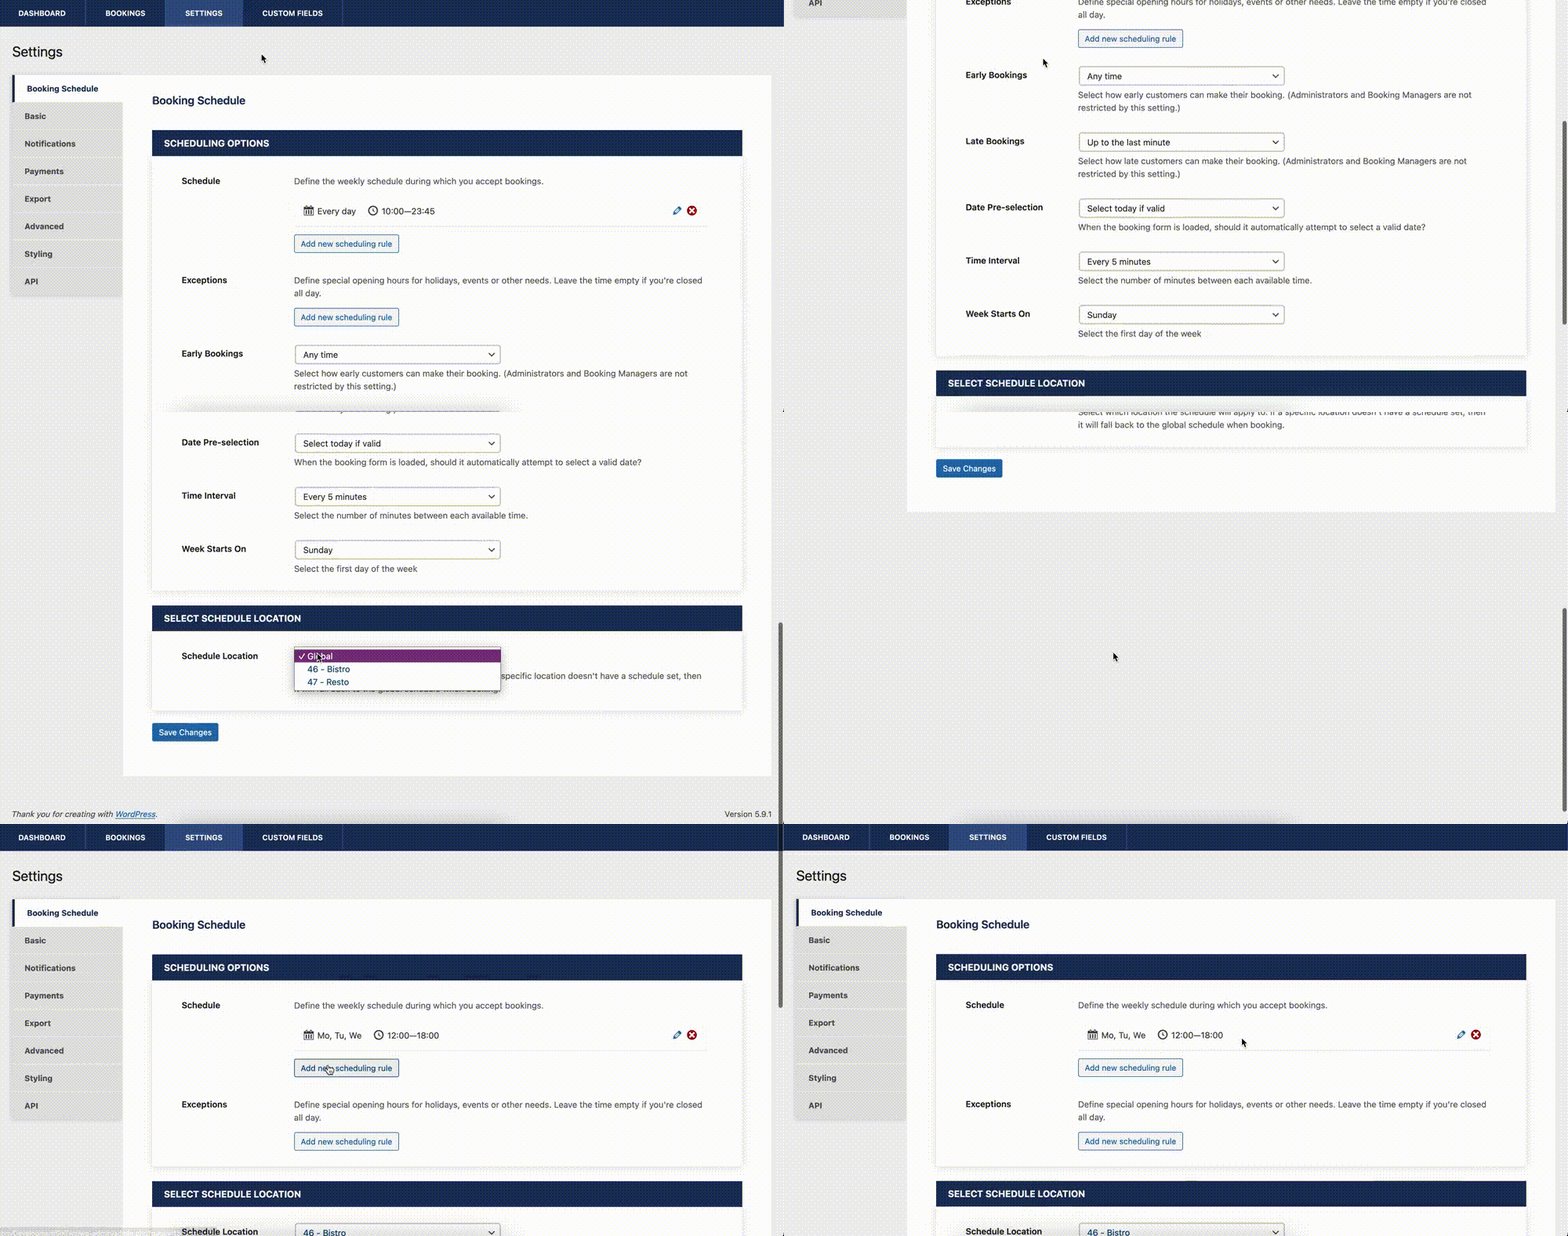
If you need to set additional restrictions on when you can accept reservations, then you can use the settings lower down on the page to do that. You can limit how early or late reservations can be made (“Early Bookings” and “Late Bookings”), as well as how the calendar pops up when clicked (“Date Pre-selection” and “Week Starts On”) and how often reservation slots are available (“Time Interval”).
Want to create separate schedules for different locations? The first thing you’ll need to do is download the Five Star Business Profile and Schema plugin for WordPress. From there, head to “Locations” in the “Business Profile” menu to create as many locations as you’d like. Now, when you head back to the “Booking Schedule” settings for Restaurant Reservations, you’ll see a “Schedule Location” dropdown. Select the location you’d like to set a schedule for using the dropdown, and then set the schedule the same way that you created your main schedule. Any location without a specifically created schedule will use the global schedule.

Next week, we’ll be talking about checking in guests, as well as sending out late arrival notifications and reservation reminders for your restaurant.


